
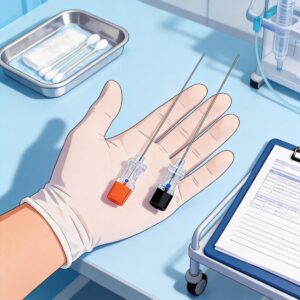
A blunt cannula is a flexible, round-tipped needle used for facial injections. Because the tip is round and blunt rather than sharp, it is not easy to damage blood vessels and nerves, so there is less bleeding and higher safety. This article explains why blunt cannulas work, then walks you through entry point selection and layer selection zone by zone. By the end, you will be able to plan an entry point and target depth for the forehead, temple, tear trough, cheek, nasolabial fold, and lips using a repeatable decision process.
Table of Contents
Why Blunt Cannulas Work
A blunt cannula does not cut through tissue the way a sharp needle does. Instead, its rounded head pushes and separates tissue planes, which is why it is less likely to injure vessels and nerves. The practical result is less bleeding and higher safety during facial injections.
The second benefit is comfort. A blunt tip reduces the pain of needle puncture, which lowers patient pain and discomfort and improves overall comfort. For a beginner, this matters because a calmer patient means fewer sudden movements mid-injection.
The third benefit is range. Blunt cannulas come in many models, including different thicknesses and lengths, so you can match the tool to the injection site and the volume you need to deliver. A longer, thinner cannula suits broad, flat zones; a shorter, thicker one suits small, contained areas.
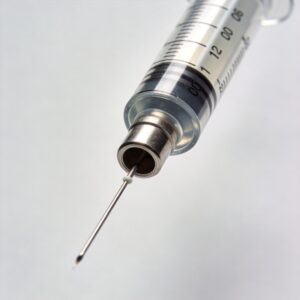
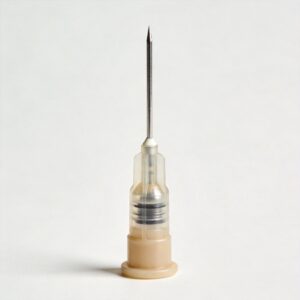
One trade-off to plan around: because the tip is blunt, you still need a sharp needle to create the initial entry port. The cannula then enters through that port and travels beneath the skin. This is why entry point planning is the core skill in cannula work.
How to Choose Entry Points and Layers: Step by Step
Follow these steps in order. Each step produces one decision you will reuse for every zone.
- Identify the target layer first. Decide whether the product belongs in the deep subcutaneous plane, the supraperiosteal plane, or a superficial plane. The layer determines how deep the cannula must travel, not the other way around.
- Choose the entry point by distance, not by convenience. Pick a point that lets the cannula reach the target zone in one or two passes. Fewer passes means less tissue trauma.
- Confirm the entry point sits over a safe corridor. The path from entry point to target should avoid known vessel and nerve routes. If it does not, move the entry point.
- Create the port with a sharp needle. Make a single small puncture at the marked entry point, angled to match the direction the cannula will travel.
- Insert the cannula through the port and advance slowly. Advance with light, steady pressure. The blunt tip will follow the path of least resistance.
- Verify depth before injecting. Once the tip reaches the target zone, aspirate, then inject a small test volume and observe the tissue response.
- Inject in a retrograde or fanning pattern. Withdraw while injecting, or fan across the zone in even lines, keeping the tip in the same plane.
- Withdraw fully and apply pressure. Hold pressure at the entry port to confirm no bleeding before moving to the next zone.
Repeat steps 2 through 8 for each additional zone. If you can reach two adjacent zones from one entry point without crossing a vessel route, use one port instead of two.
Zone-by-Zone Entry Point and Layer Reference
The table below summarizes the standard approach for each zone. Layer names refer to the plane the cannula tip should sit in when you begin injecting.
| Facial Zone | Entry Point | Target Layer | Notes |
|---|---|---|---|
| Forehead | Lateral temple or mid-forehead | Deep subcutaneous, above periosteum | Advance horizontally to avoid the central vessel route |
| Temple | Lateral brow or upper cheek | Deep subcutaneous or supraperiosteal | Stay deep; the temple has a dense vessel network |
| Tear trough | Mid-cheek, lateral to the trough | Supraperiosteal | Approach from below and lateral, never from directly above |
| Cheek / midface | Lateral cheek or nasolabial region | Supraperiosteal or deep subcutaneous | Fan in two or three passes for even distribution |
| Nasolabial fold | Lateral cheek, parallel to the fold | Deep dermal to subcutaneous | Approach parallel to the fold, not perpendicular |
| Lips | Oral commissure | Submucosal or deep subcutaneous | Advance along the lip body in one continuous pass |
For all six zones, the same principle applies: the entry point is chosen so the cannula can reach the layer you already selected. If the entry point forces you to cross a vessel route, reposition it rather than changing the layer.
Common Mistakes and How to Fix Them
These are the errors beginners make most often, with the symptom you will see and the fix.
- Mistake 1: Entering too superficially. Symptom: the skin blanches or dimples immediately, and the cannula feels like it is scraping. Fix: withdraw, redirect deeper, and re-verify depth before injecting. Superficial placement is the most common cause of visible lumps.
- Mistake 2: Using too many entry points. Symptom: multiple puncture marks and unnecessary bruising. Fix: map the zone before you start and plan the fewest ports that still cover it. One well-placed port with a fanning pattern usually replaces two or three.
- Mistake 3: Choosing cannula length by habit. Symptom: you cannot reach the far edge of the zone without repositioning, or the cannula feels unwieldy in a small area. Fix: match length to the zone’s longest dimension. Blunt cannulas come in different thicknesses and lengths, so select the model for the site and the volume you need.
- Mistake 4: Injecting before confirming the plane. Symptom: uneven product distribution or unexpected resistance. Fix: aspirate and inject a small test volume first, then continue only after the tissue responds as expected.
- Mistake 5: Skipping pressure after withdrawal. Symptom: a small bruise at the port that could have been avoided. Fix: hold firm pressure at the entry point for a full count before moving on.
If you notice any sign of vascular compromise, stop the injection immediately, do not inject further product, and follow your clinic’s vascular event protocol. This article is educational and does not replace supervised hands-on training.
FAQ
Do I still need a sharp needle if I use a blunt cannula?
Yes. The blunt tip cannot create its own entry port, so you make one small puncture with a sharp needle first, then insert the cannula through it.
How do I know which layer I am in?
Judge by resistance and tissue response. Deep placement feels smooth with little resistance; superficial placement feels like scraping and often causes blanching or dimpling. Aspirate and inject a small test volume to confirm before continuing.
Can I use one entry point for several facial zones?
Sometimes. If two adjacent zones share a layer and the path between them avoids vessel routes, one port works. If the layers differ or the path crosses a vessel route, use separate entry points.
Which cannula size should a beginner start with?
Start with a mid-range thickness and a length that matches your target zone’s longest dimension. Blunt cannulas are available in many thicknesses and lengths, so choose the model that fits the site and the injection volume rather than defaulting to one size for every zone.
Why does a blunt cannula bruise less?
The round, blunt head separates tissue instead of cutting it, so it is not easy to damage blood vessels and nerves. Less vessel injury means less bleeding and higher safety.
Is a blunt cannula less painful for the patient?
Yes. It reduces the pain of needle puncture, which lowers patient pain and discomfort and improves comfort during the procedure.
For anatomy and safety guidance, consult peer-reviewed references such as the PubMed database maintained by the U.S. National Library of Medicine, and follow your regional aesthetic medicine association’s training standards. Always work under qualified supervision until you have completed formal hands-on training.



 English
 Deutsch
 Français