
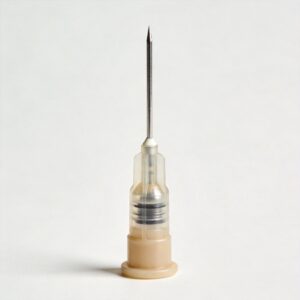
Disposable anesthesia needle sharpness is the single biggest controllable factor in how much pain a patient feels during a puncture. A sharper needle cuts tissue with less force, which means less pressure on nerve endings, less tissue drag, and a faster, cleaner entry. Patient comfort during anesthesia puncture is the result of three needle variables working together: sharpness, edge curvature, and length — matched to the puncture site and the patient’s body type.
By the end of this article, you will be able to read a needle specification, match it to a puncture site and body type, use the needle’s scale and vernier markings to pre-set puncture depth, and recognize the four most common mistakes that turn a comfortable puncture into a painful one.
Table of Contents
- Why Needle Sharpness and Geometry Control Patient Comfort
- How to Match a Disposable Anesthesia Needle to the Patient and Site
- How to Use Scale and Vernier Markings to Control Puncture Depth
- Common Mistakes and How to Fix Them
- FAQ: Disposable Anesthesia Needle Sharpness and Patient Comfort
Why Needle Sharpness and Geometry Control Patient Comfort
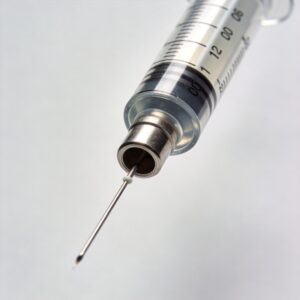
Every puncture is a mechanical event. The needle tip must separate tissue fibers, and the force required to do that is what the patient feels. A dull or incorrectly shaped tip does not slice — it pushes, tears, and drags, which is exactly the sensation patients describe as burning or pressure.
Three geometric properties determine how cleanly that separation happens:
- Sharpness — how fine the tip is. A finer tip concentrates force into a smaller area, so less total force is needed to enter tissue.
- Edge curvature — the shape of the cutting edge behind the tip. Different curvatures suit different tissue types and different puncture sites.
- Length — how far the needle travels. Excess length beyond the target depth means more tissue is traversed, and more tissue means more discomfort.
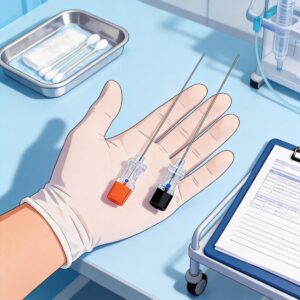
This is why a single “one needle fits all” approach fails. According to clinical customization practice, needles are produced with different sharpness, edge curvature, and length specifically to match the personalized needs of doctors, the different puncture sites, and different patient body types. The needle is not a generic tool — it is a matched instrument.
There is a fourth factor that is often overlooked: the needle base. A base made of special materials that resist oxidation keeps the needle’s fit and alignment stable, which prevents micro-wobble during insertion. Wobble translates directly into tissue tearing and patient discomfort.
How to Match a Disposable Anesthesia Needle to the Patient and Site

Matching is a decision process, not a guess. Work through the following steps in order. Each step produces one concrete decision you can act on.
- Identify the puncture site. Write down the anatomical location. The site determines the tissue type the needle must pass through, and tissue type determines the edge curvature you need.
- Classify the patient’s body type. Record whether the patient is lean, average, or with thicker subcutaneous tissue at that site. Thicker tissue at the same site requires a longer needle to reach the same target depth.
- Define the target depth. State the depth in millimeters where the needle tip must stop. This is the number that drives every later decision.
- Select edge curvature for the tissue. Choose the curvature that suits the site’s tissue. Because curvature options exist specifically to serve different puncture sites, confirm the available curvature options with your supplier or clinical protocol before selecting.
- Select sharpness for the tissue resistance. Higher tissue resistance calls for a finer, sharper tip so the required insertion force stays low.
- Select length from target depth plus margin. Choose a needle long enough to reach the target depth but not longer than necessary. Length can be customized to the user’s requirements, so specify the exact length rather than accepting a default.
- Confirm the needle base material. Verify the base uses a material that resists oxidation, so alignment stays true through the procedure.
- Verify the needle carries scale and vernier markings. If it does not, you cannot pre-set depth — go back to step 6 and request a needle that does.
Steps 1 through 3 are clinical decisions. Steps 4 through 8 are specification decisions. Keeping them separate prevents the common error of choosing a needle by habit rather than by measurement.
How to Use Scale and Vernier Markings to Control Puncture Depth
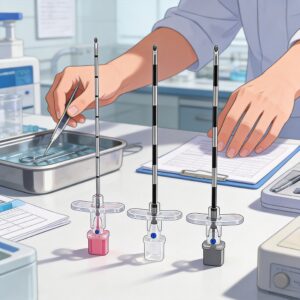
Depth control is where needle design directly protects the patient. When the needle tube is equipped with a scale and vernier device, the operator has obvious indication marks during clinical operation. That means depth is set before the puncture, not estimated during it.
Follow this sequence to pre-mark depth:
- Read the target depth you defined in the matching process.
- Align the vernier against the scale so the vernier standard points exactly at the target depth value.
- Lock your visual reference — confirm the mark is visible from your working angle before you begin.
- Insert to the marked depth only. Stop when the vernier mark reaches the tissue surface.
- Do not advance past the mark without re-evaluating, because the mark exists to prevent overshoot.
The practical benefit is stated plainly in clinical customization practice: before surgical puncture, the puncture depth can be accurately marked according to the vernier standard, which effectively protects and avoids unexpected parts. In other words, the marking system is a safety mechanism, not a convenience feature.
Compare the two approaches directly:
| Approach | Depth set when | Overshoot risk | Patient comfort effect |
|---|---|---|---|
| No scale or vernier | Estimated during insertion | High — depends on operator feel | Variable; deeper-than-needed travel increases discomfort |
| Scale and vernier markings | Pre-marked before puncture | Low — hard visual stop point | More consistent; needle travels only as far as needed |
Both rows assume the same needle sharpness. The difference is entirely in depth control — which shows that sharpness and depth control are two independent levers on patient comfort, and both must be set correctly.
Common Mistakes and How to Fix Them
These are the four errors that most often turn a well-planned puncture into a painful one. Each is listed with its symptom and its fix.
Mistake 1: Using one needle type for every site
Symptom: The same needle feels acceptable at one site but produces noticeably more resistance and patient complaint at another. Fix: Match edge curvature and sharpness to the specific puncture site, since curvature options exist precisely to serve different sites. Build a site-to-specification reference so selection is not left to memory.
Mistake 2: Ignoring patient body type when choosing length
Symptom: The needle either fails to reach the target depth or travels well past it. Fix: Choose length from the patient’s body type at that site plus the measured target depth. Because length can be customized to user requirements, specify it per patient population rather than ordering a single default length.
Mistake 3: Estimating depth by feel instead of using the vernier
Symptom: Depth varies between procedures on similar patients, and there is no way to explain why. Fix: Pre-mark depth using the scale and vernier standard before puncture. This converts depth from a subjective judgment into a visible, repeatable setting.
Mistake 4: Overlooking needle base condition
Symptom: The needle feels loose or misaligned at the hub, and insertion feels rougher than expected. Fix: Confirm the needle base is made of special materials that are not easy to oxidize. A stable, oxidation-resistant base keeps the needle aligned and prevents the micro-movement that tears tissue.
If you fix only one of these, fix Mistake 3. Depth overshoot is the most direct cause of avoidable patient discomfort, and it is the easiest to eliminate with a vernier marking.
FAQ: Disposable Anesthesia Needle Sharpness and Patient Comfort
Does a sharper needle actually hurt less?
Yes. A sharper tip concentrates insertion force into a smaller area, so the total force needed to pass through tissue drops. Less force means less pressure on nerve endings, which the patient experiences as less discomfort. Sharpness is the primary comfort variable you control.
How do I know which edge curvature to choose?
Choose curvature based on the puncture site and its tissue type. Because needles are produced with different edge curvatures to meet different clinical needs, the correct curvature for your site should be confirmed against your clinical protocol or with your supplier. Do not assume one curvature works everywhere.
Can I set the puncture depth before I start?
Yes, if the needle tube is equipped with a scale and vernier device. You align the vernier standard to your target depth, confirm the mark is visible from your working angle, and then insert only to that mark. This is the recommended approach because it protects and avoids unexpected parts.
Why does the needle base material matter for comfort?
A base made of special materials that resist oxidation stays dimensionally stable. A stable base keeps the needle properly aligned, which prevents wobble during insertion. Wobble causes tissue tearing, and tissue tearing is felt by the patient.
Can needle length be customized?
Yes. Length can be customized according to user requirements, and sharpness, edge curvature, and length can all be customized to meet clinical needs. This means you can specify a needle matched to a specific puncture site and patient body type rather than accepting a single standard size.
Once you can read a needle specification, match it to a site and body type, and pre-set depth with the vernier, patient comfort stops being a matter of luck. It becomes a repeatable result of correct selection.


 English
 Deutsch
 Français